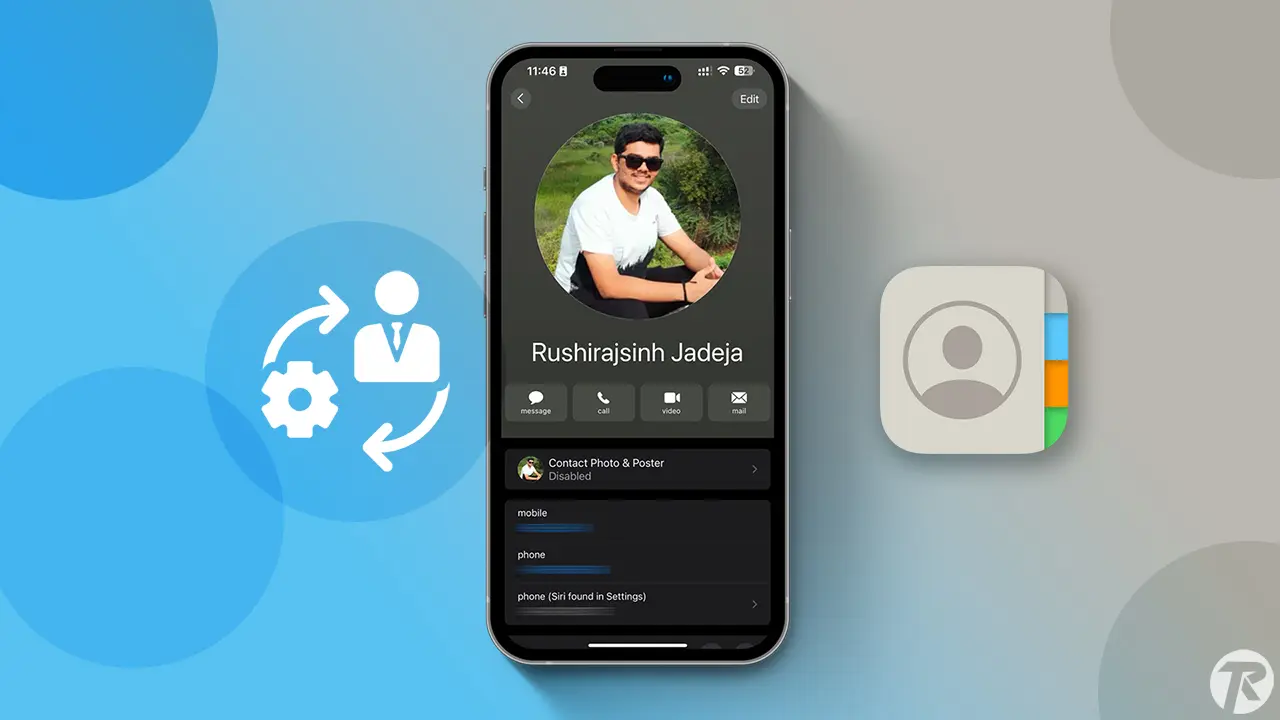
- To change Contact Photo: Contact > Select contact > Edit Photo & Poster > Change.
Apple’s iPhone 15 series introduces a new feature, the Contact Poster. Along with this, Apple has upgraded its contact app. However, some users find it tricky to modify contact photos in the new iOS 17 update. This article simplifies the process of changing a contact photo in iOS 17.
Assuming you’re at a business event and meet a potential contact. Instead of exchanging paper cards, you both use NameDrop. With a quick tap of your iPhones, your personalized contact posters, complete with photos, are swapped. When you share your contact poster, they see your photo and contact details.
How to Set up Contact Photo on iPhone
Here’s a step-by-step guide on how to set up a contact photo on your iPhone:
Step 1: Open the contact app on your iPhone.
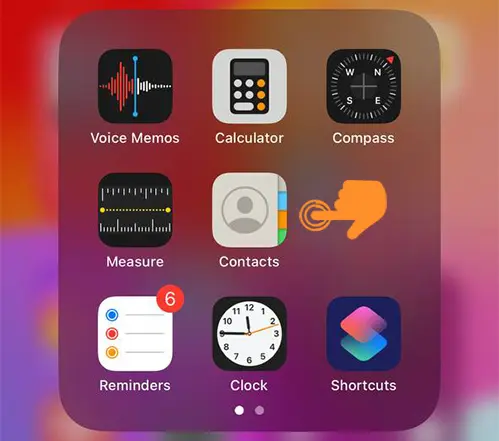
Step 2: Browse your contacts and select the one you want to change the photo for.
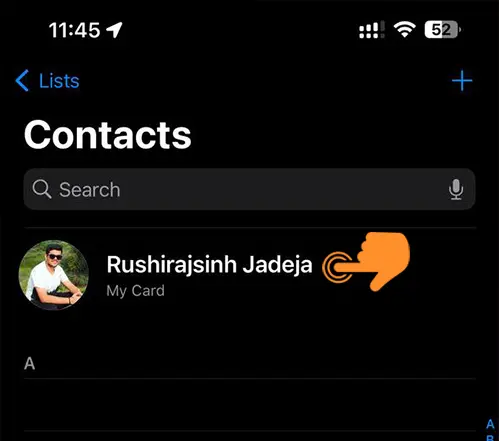
Step 3: In the detailed view, find the Contact Photo & Poster option and tap on it.

Step 4: Click the Edit button to start customizing.
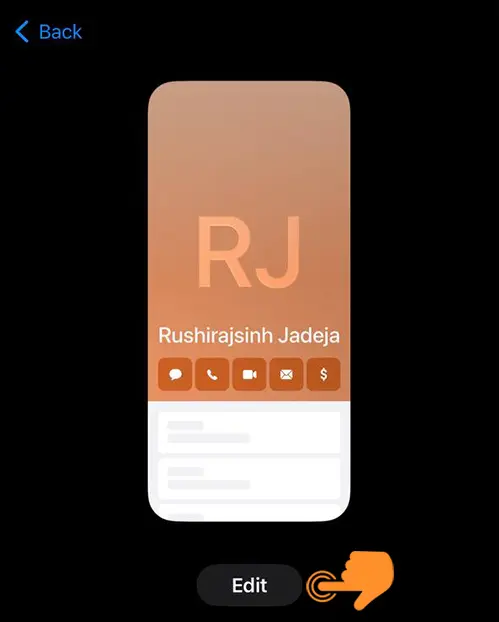
Step 5: Change the contact card style to Photo by tapping on the “Customize” option.
Step 6: Two options will appear: Contact Photo and Poster. Click on Contact Photo.
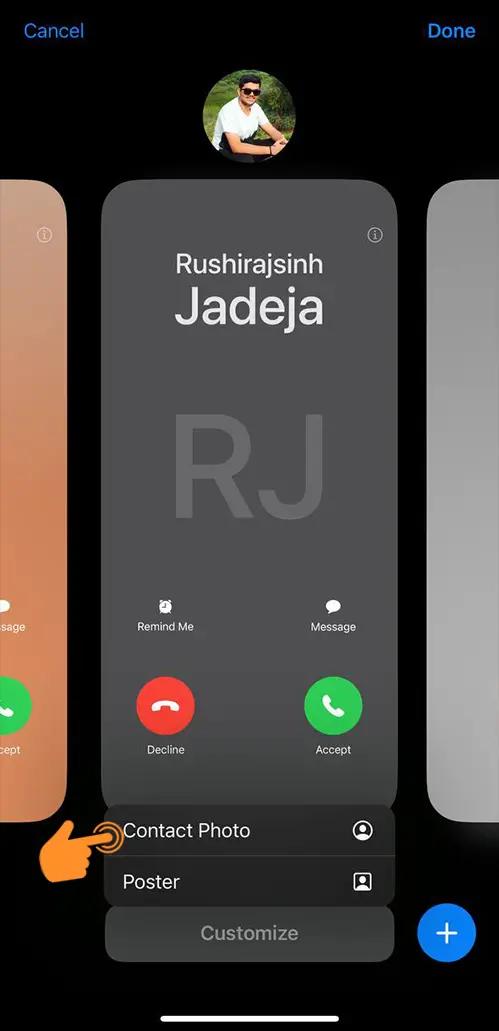
Step 7: You’ll see four options for selecting an image: Camera, Photos, Memoji, and Monogram. Tap Photos if you have a specific photo in mind.
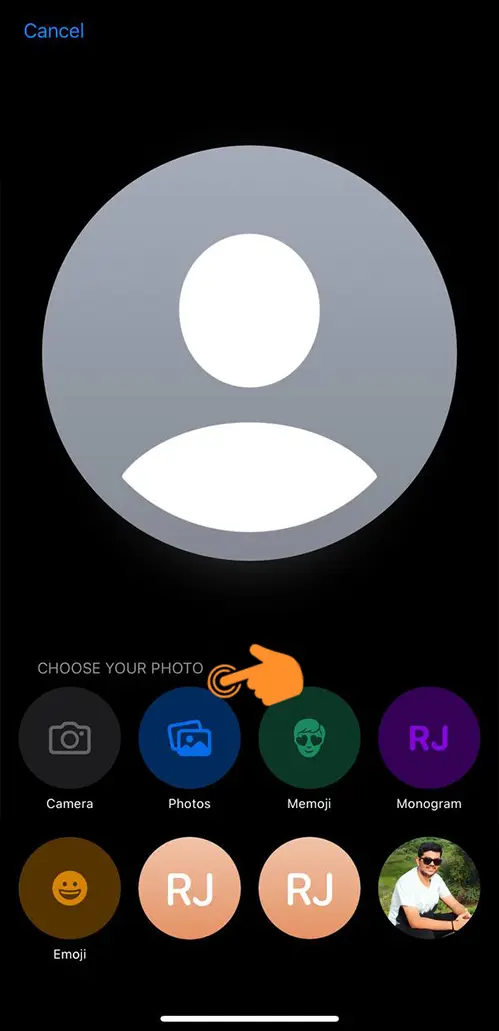
Step 8: Select the image you want from your Photos library. Adjust its size and position, then tap “Choose.”

Step 9: The next screen lets you change the photo’s filter. Make any adjustments and click “Next.”
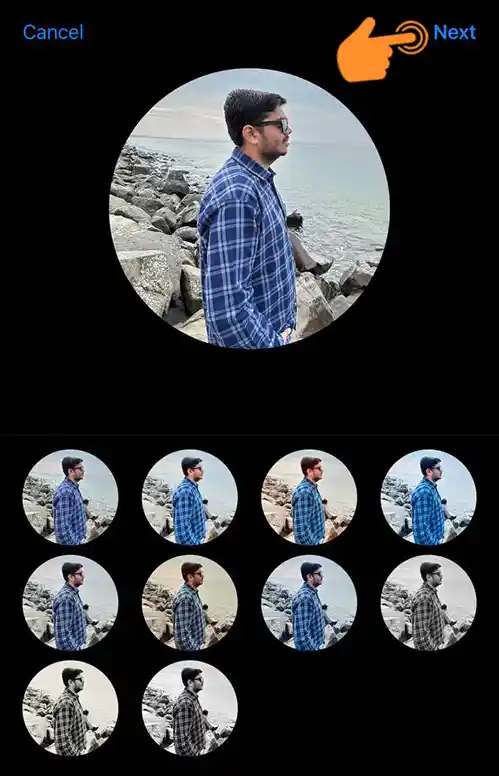
Step 10: If you’re replacing an existing photo, a prompt will ask you to confirm the update. Tap “Update.”
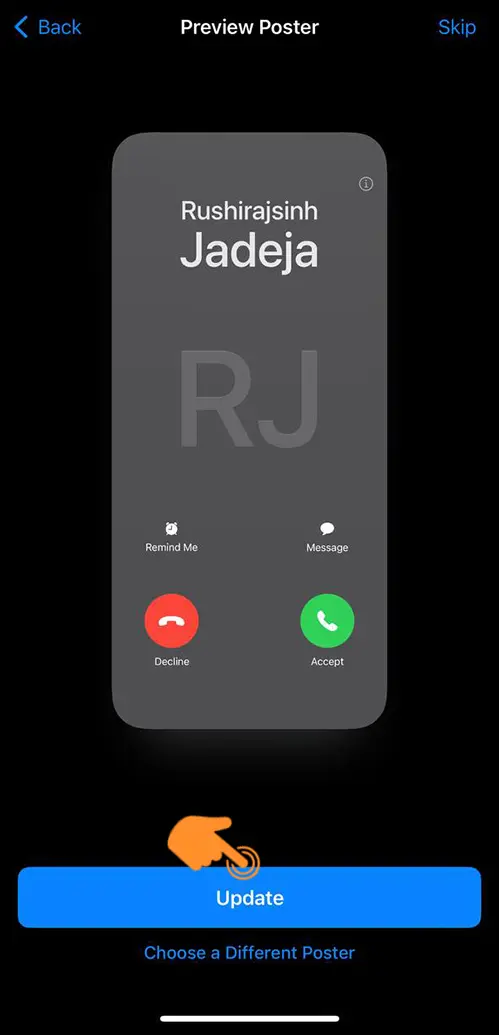
And that’s it! You’ve successfully changed your contact photo on iPhone. These instructions make it easy to personalize your contact card or any other contact photo on your iPhone running iOS 17.

