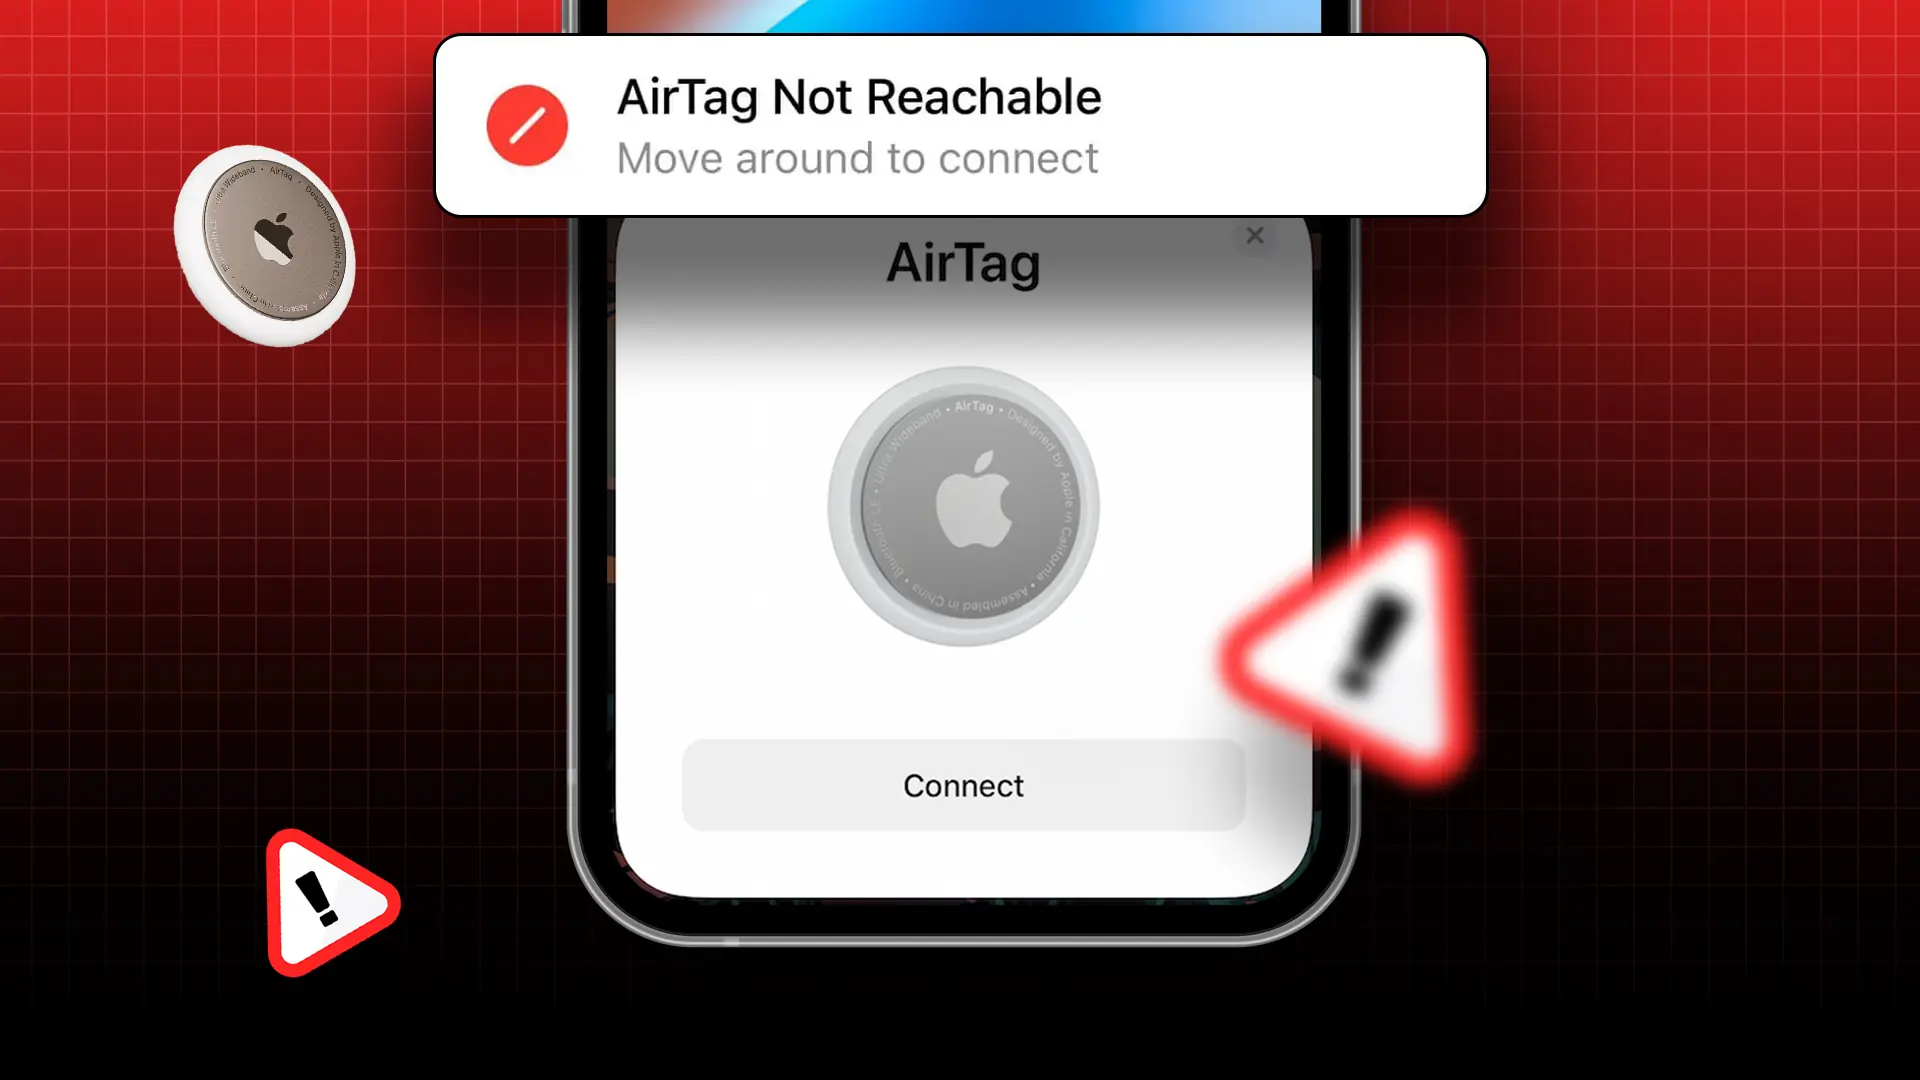
Apple’s AirTag is a popular tool for tracking your belongings. But before you can use it, you need to set it up. Some people face a problem where they get the “AirTag not connecting” message when they try to link their AirTag to an iPhone or iPad.
If your AirTag is not linking, you may see a message in your Find My app saying “AirTag Not Reachable, move around to connect“. In this post, I will share some ways to avoid this error.

What You Need to Connect an AirTag
If you’re setting up, connecting, or pairing an AirTag for the first time, here’s what you need to know:
- Your device (iPhone, iPad, or iPod touch) needs to be running iOS 14.5 or iPadOS 14.5 or later.
- Your Apple ID needs to have two-factor authentication turned on.
- The “Find Me” option should be enabled.
- Your Bluetooth or Wi-Fi needs to be on.
- Your iPhone or iPad’s location services need to be on.
- If you have an iPhone 11 or 12 series smartphone, use Precision Finding’s go-to location settings for pinpointing your AirTag’s location.
How to Connect or Pair AirTag with iPhone (Set Up AirTag)
If you’ve checked all the boxes above, here’s how to connect your AirTag:
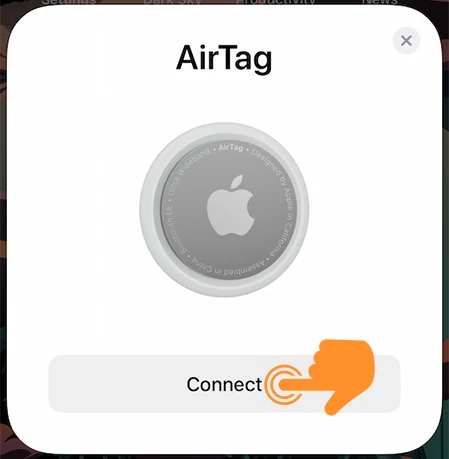
Step 1: Bring your AirTag close to your iPhone or iPad. and A pop-up will appear at the bottom of your screen with a “Connect” button. Tap it.
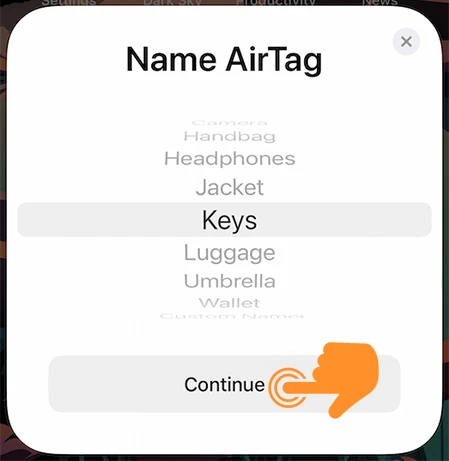
Step 2: Your AirTag will suggest several names for different items. Pick one, or create a custom name if none of them fit. Then hit “Continue.”
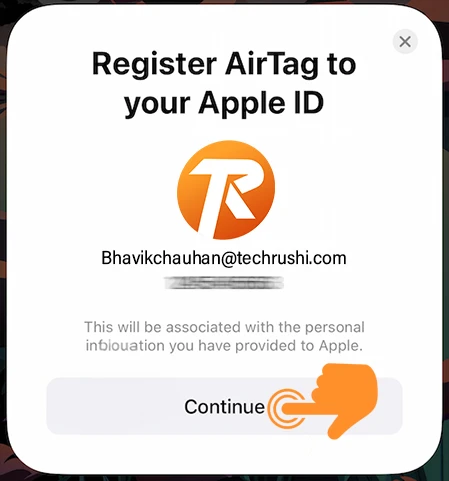
Step 3: Next, the AirTag will ask you to register with your Apple ID. Tap Continue to let it, and your AirTag will start to register. This takes about a minute, and then your AirTag will be linked to your Apple ID.
Now you can attach your AirTag to whatever you want to track. If you’ve done all this and your AirTag still won’t connect, try these simple fixes for “AirTag Not Connecting”.
Note: If your AirTag isn’t connecting with your iPhone or iPad, make sure your device is updated to the latest version. Also, try restarting your device.
Fixes For “AirTag Not Connecting” Problem
If your AirTag still isn’t connecting, let’s look at all the possible reasons why. Then we’ll try the best AirTag tips and tricks to fix it.
Method 1: Factory Reset AirTag (Remove and Reconnect AirTag)
If your AirTag won’t connect to any device, the easiest fix is to remove and reconnect your AirTag. This often solves the problem. To reset your AirTag:
Step 1: Open the Find My app on your iPhone or iPad. Next, pick the “Items” option below. Then, choose the AirTag you want to reset from the list.
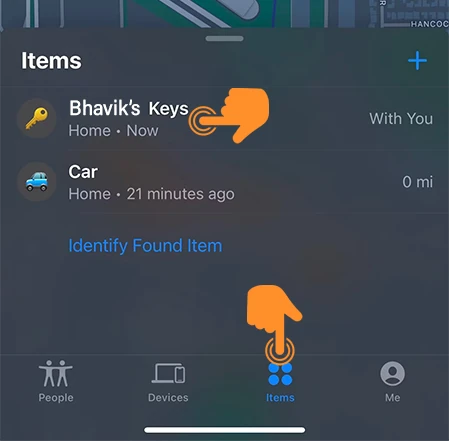
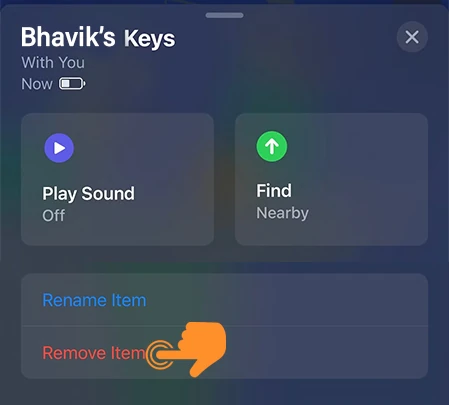
Step 2: Swipe up to get to the AirTag settings. Tap on the “Remove Item” option at the bottom.
Step 3: Finally, confirm your choice by tapping on “Remove” again.
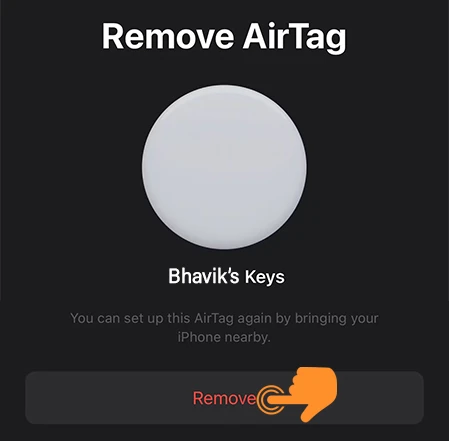
After resetting the AirTag, follow the steps above to reconnect it to your iPhone or iPad.
Method 2: Enable the Find My iPhone option
To use AirTag, you need to use a switch in the “Find My” Settings. You can turn this on or off if needed. To turn on Find My iPhone:
Step 1: Open Settings on your iPhone and tap your name.
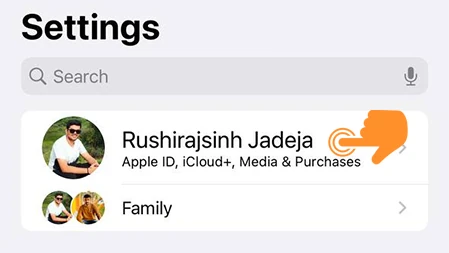
Step 2: On your profile page, scroll down and find “Find My”. Tap on it.
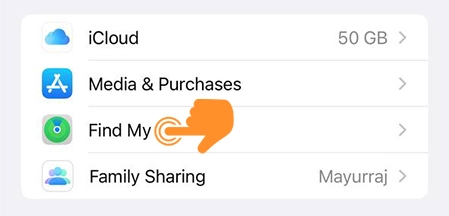
Step 3: Tap on “Find My iPhone.”
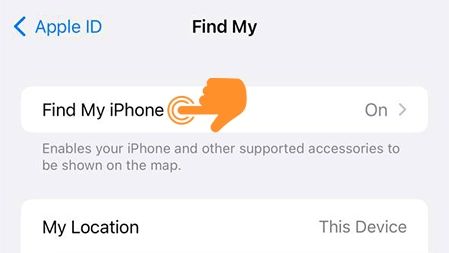
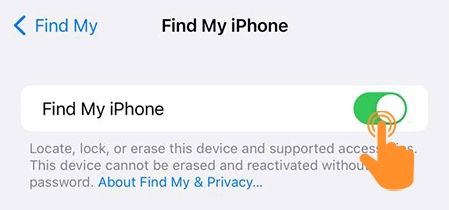
Step 4: Switch on the “Find My iPhone” toggle.
Method 3: Enable Two-Factor authentication for Apple ID
To connect AirTags to your iPhone or iPad, you need to have two-factor authentication (2FA) turned on. If it’s off, here’s how to turn it on:
Step 1: Open Settings on your device. Tap your name.

Step 2: On your profile page, tap “Password & Security.”
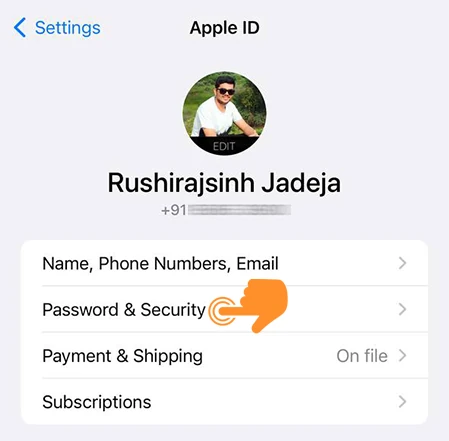
Step 3: Make sure “Two-Factor Authentication” is on.
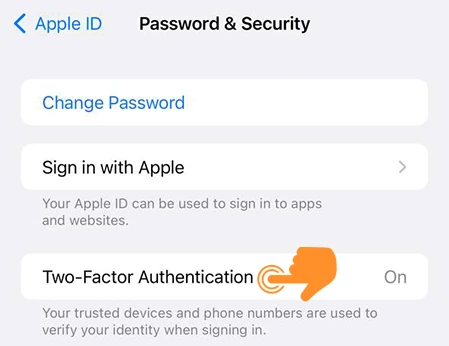
To set up 2FA for your Apple ID, you’ll need to provide your phone number and answer some security questions.
Method 4: Enable Precision Finding
Apple’s rules say you must turn on Precision Finding to use AirTag. This helps accurately find the distance and direction of the AirTag when it’s close. It uses a U1 chip, which helps AirTags detect and connect accurately.
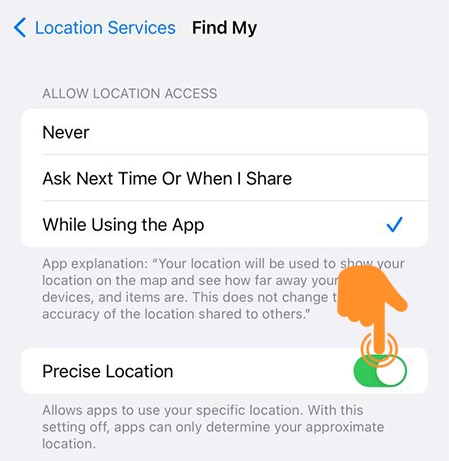
Also, make sure Find My can access your location. To do this:
Step 1: Open the Settings app on your iPhone. Scroll down and click on “Privacy & Security.”
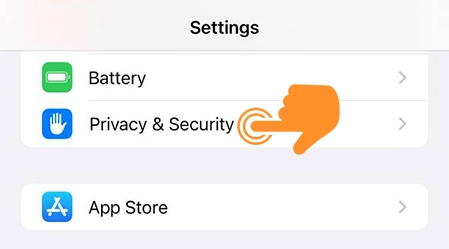
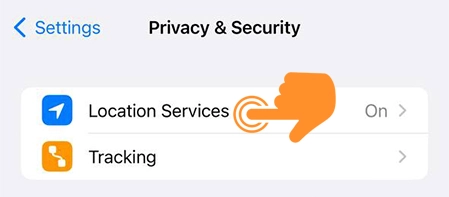
Step 2: Tap on “Location Services.”
Step 3: Choose the “Find My” option on the ‘Location Services’ page.
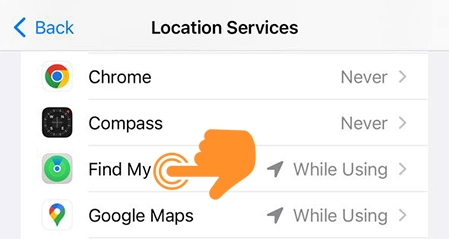
Step 4: Choose an option for Allow Location Access and switch on the “Precise Location” toggle.
Method 5: Reset Network Settings
If you’re using AirTag, you need to enable Wi-Fi or Bluetooth. If there’s a problem with either, your AirTag may not connect to your iPhone. To solve this, you can reset all network settings. Here’s how:
- On your iPhone, open Settings. Click on General.
- Scroll down to the end and tap on “Transfer or Reset iPhone.”
- Click ‘Reset’, then tap on “Reset Network Settings” in the pop-up menu.
- Click “Reset” again to confirm.
That’s it! This guide helps you connect your AirTag to your iPhone or iPad. By following these steps, you can easily set up AirTag and troubleshoot any AirTag Not Connecting issues.

