- To move files: Open Books app > Long-press the file > Share > Save to Files.
The Books app on your iPhone or iPad is the best tool for reading e-books, PDFs, and other documents. But when you need to move files from the Books app to the Files app for offline access or to share with others, this guide will show you how to do that.
For example, if you’re a college student who has downloaded lecture notes, research papers, and numerous e-books on your iPad, you’ll need to submit these to your professor at the end of the semester. At that time, you’ll need these documents in the Files app, so follow the steps below to do this.
How to Move Files from Apple Books to Files App
Step 1: Open the Books app on your device and find the file you want to move, be it an eBook, PDF, or audiobook.

Step 2: Press and hold the file, then tap the “Share” option.

Step 3: From the sharing options, pick the “Save to Files” option.
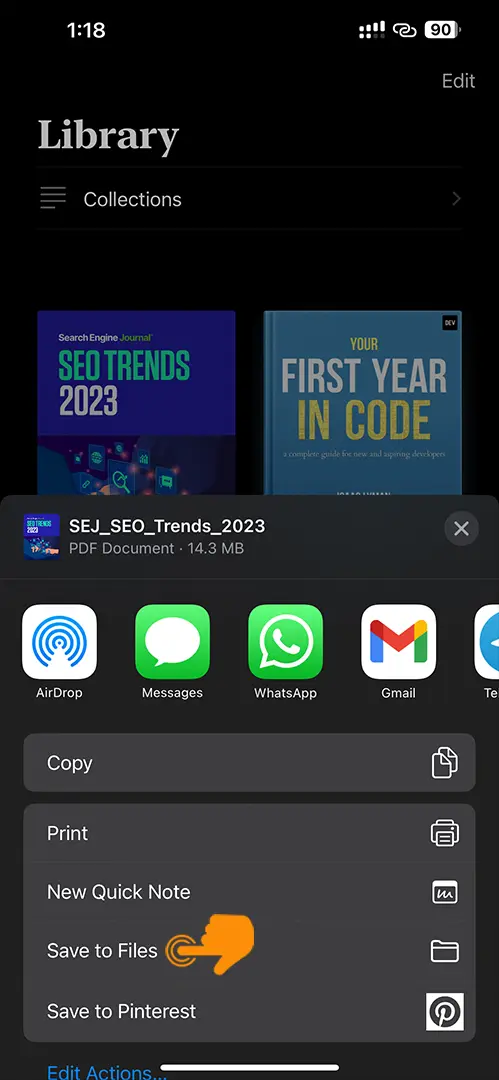
Step 4: The Files app will open up. Choose where you want to save the file, like iCloud Drive or a specific folder.
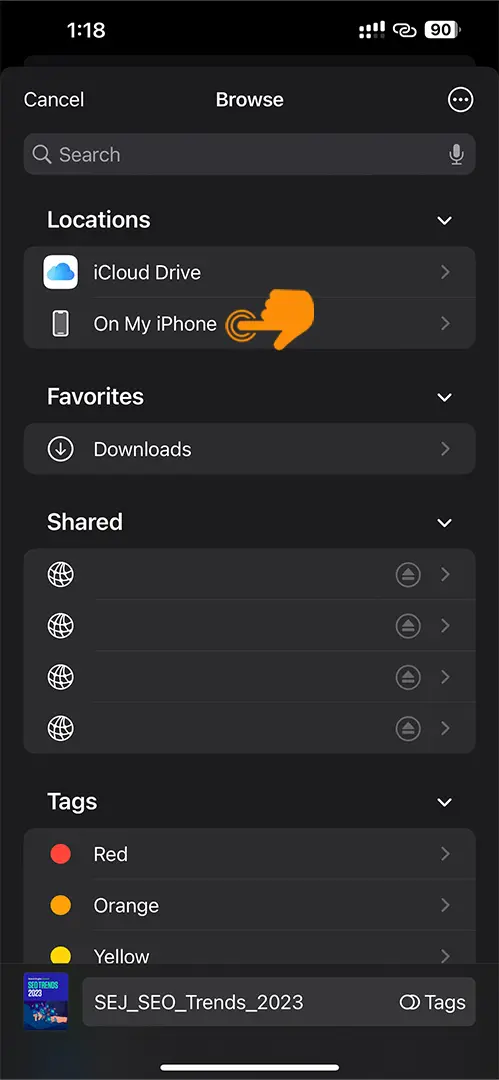
Step 5: Hit the “Save” button, and the file will be moved from the Books app to the Files app.

Tips for Better File Management
To enhance your file management within the Apple Files app, consider these extra tips:
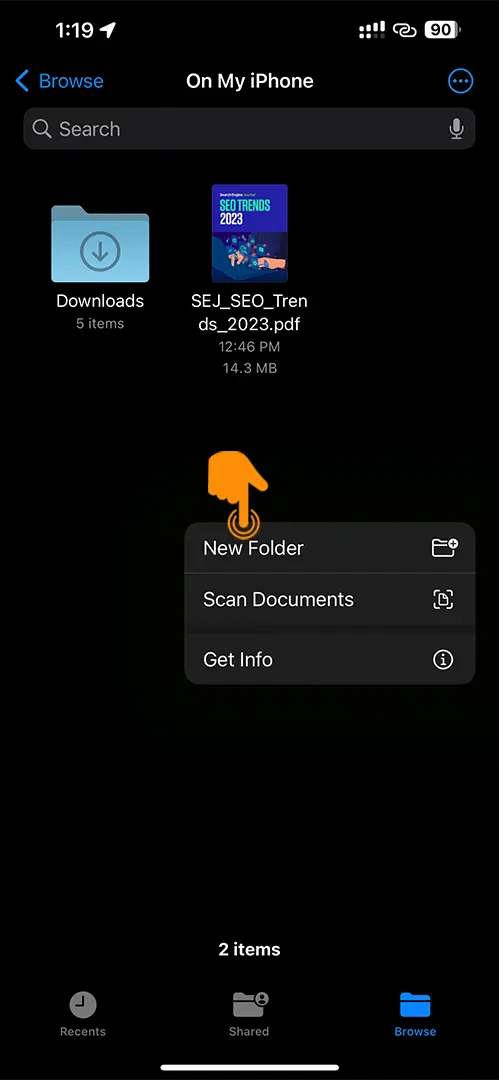
Create folders:
- You can make folders in the Apple Files app to keep your files tidy. Just press and hold on a space, pick “New Folder”, and name it.
File Tags:
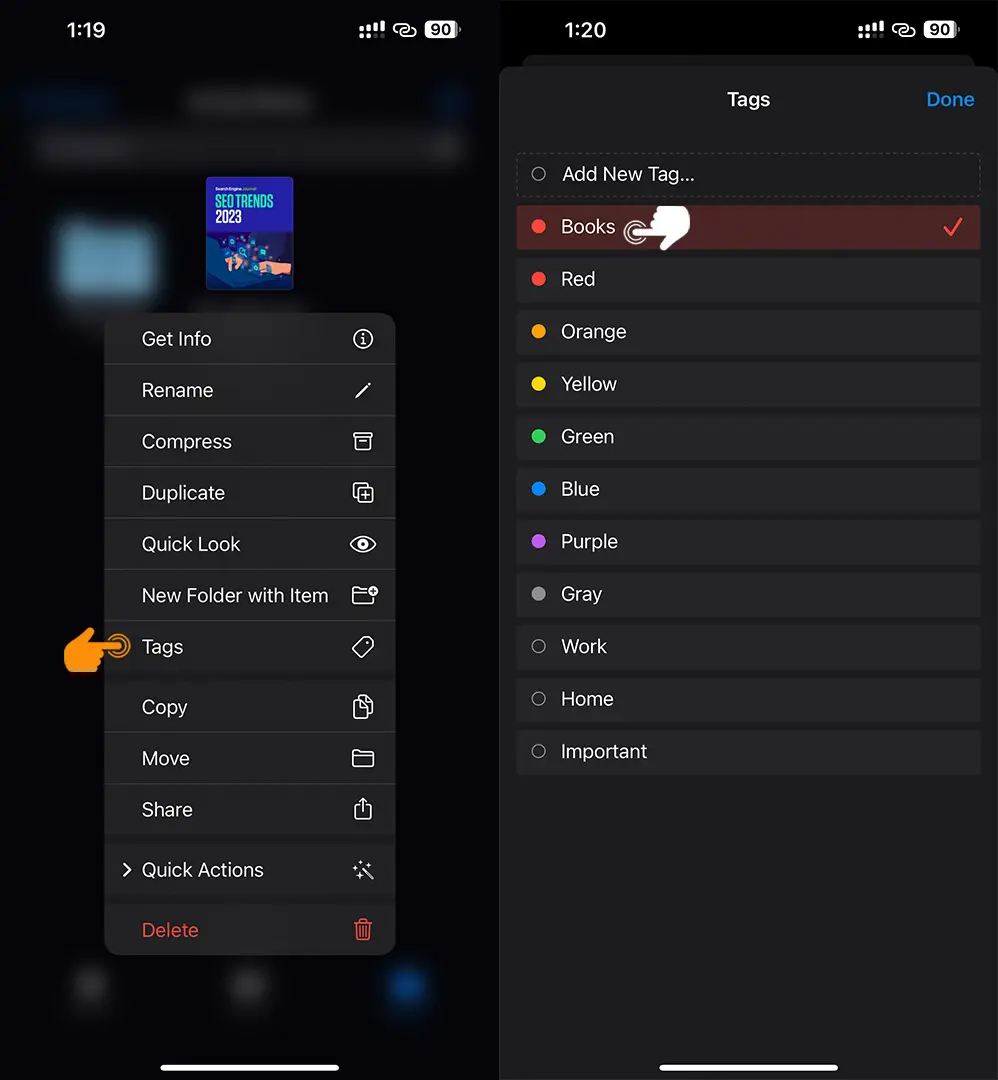
- The Files app lets you tag files for easier classification and searching. Press and hold a file, pick “Tags”, and select or create the tags. This way, you can find files quickly based on their tags.
Sort Options:
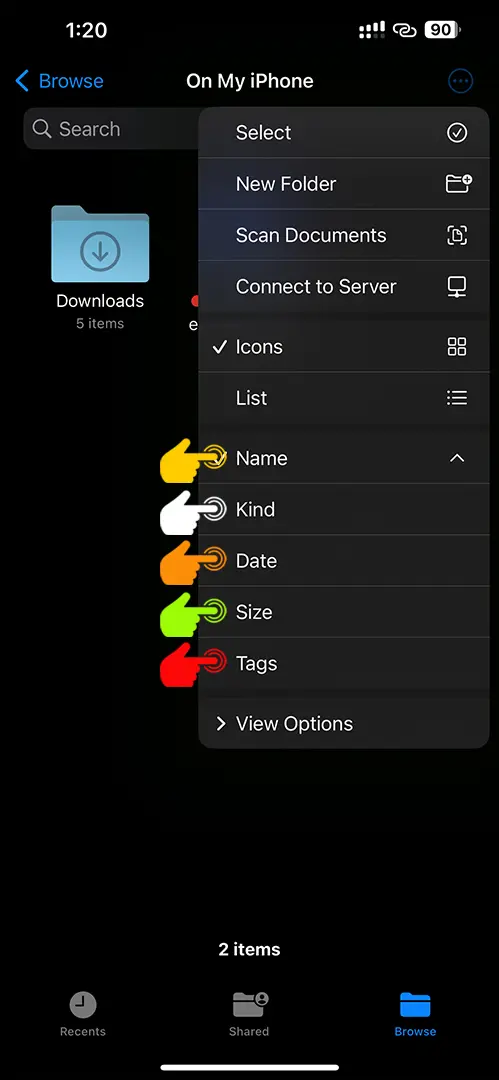
- Use the sorting options to locate files more quickly. Tap the Sort button in the top-right corner, and choose to sort files by name, date, size, or tags.
Regular Maintenance:
- It’s a good idea to clean up your files from time to time, just like tidying up your room. Delete or archive files you no longer need to keep your file apps clean and organized.
And that’s it! This helps declutter the Books app and makes it easier to find and organize your files. So, whether you’re a student with loads of documents or a professional, this simple trick will simplify your life.

