- iCloud keeps your notes safe and ready to recover if you lose or replace your device.
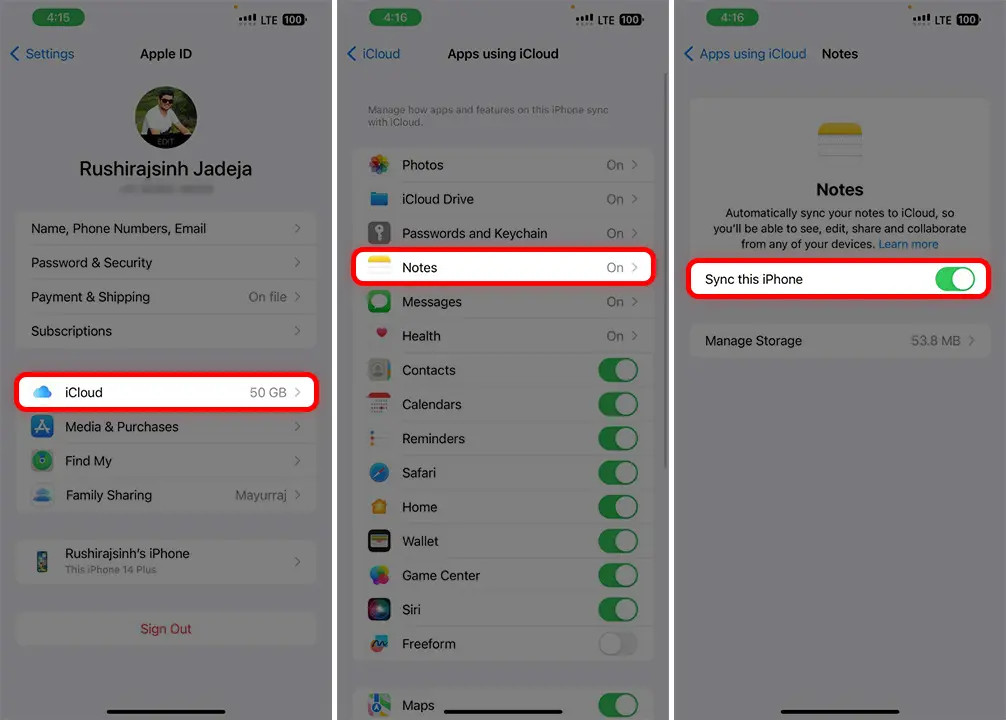
- To sync notes: Go to Settings > Your Profile > iCloud > Notes, then switch the toggle.
The Notes app on your iPhone is a handy tool for writing quick thoughts, reminders, and lists. You can save your information securely by locking your notes. If your device gets lost or stolen, you can still access these notes on another Apple device by syncing them with iCloud.
If you’re unsure how to do this, then I will show how you can sync notes to iCloud using your iPhone. This allows you to open, edit, and organize your notes on any Apple device, as long as you’re using the same Apple ID.
Why Should You Sync Your iPhone Notes?
- View your notes on any Apple device – iPhones, iPads, or Macs.
- Make a change on one device, and it’ll update everywhere.
- iCloud keeps your notes safe, and ready to recover if you lose or replace your device.
- Share notes for others to view and edit in real time.
Remember, to access the iPhone notes on other devices, use the same Apple ID across all devices.
How to Sync Notes to iCloud Using iPhone
To sync iPhone Notes with iCloud, follow these steps:
- Open Settings and tap on “your profile” at the top.
- Tap on “iCloud.”
- Hit the “Show All” option.
- If it is turned off, switch the Notes toggle until it’s green.

To disable Notes syncing: Go to Settings > Your Profile > iCloud > Find “Notes” and switch off the “On My iPhone” option.
That’s it! By following these steps, your iPhone notes will appear on other Apple devices and you can access them. You can also share your notes with friends to show them your work progress and other things.


