Is your iPhone’s auto brightness failing to function after upgrading to iOS 17? If so, you’re likely feeling the frustration that accompanies this unexpected hiccup. Auto brightness is automatically adjusting the brightness of your screen to suit the surrounding environment. When it fails to work, it can throw off your whole interaction with your device.
But don’t worry. We have assembled a list of 25+ professional tips to help you get to the bottom of this problem and fix auto brightness on iPhones after upgrading to iOS 17. By the end of this guide, you should have a clear path to restore this vital feature, ensuring that your smartphone once again seamlessly adapts to your surroundings. Let’s dive in!
Fix Auto Brightness Not Working on iPhone
Since iOS 17 is still in its early stages, it’s plausible that you might be using a beta version, notorious for accompanying bugs and glitches. It might be the reason for the auto brightness issue on your iPhone.
Auto brightness can extend battery life by dynamically adjusting the screen brightness to suit various environments. Here’s how to get it working again.
1. Restart your iPhone after updating to iOS 17
Often, glitches related to a fresh iOS 17 update can be resolved by merely restarting your device. This simple action can clear temporary caches and restart system processes that might have gone awry during the update.
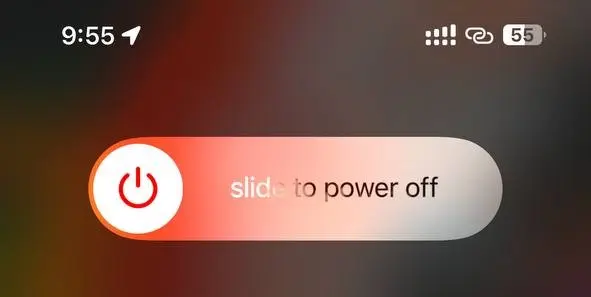
- Hold down the power and volume-down buttons on your iPhone until you see the “slide to power off” slider.
- Slide to power off your device completely.
- Wait for a few seconds and then hold the power button again to turn your iPhone back on.
In many cases, this simple restart can fix the problem, and you’ll be back to enjoying the convenience of automatic brightness adjustment according to your surroundings.
2. Toggle Auto Brightness On/Off
Did the restart not resolve the problem? Don’t worry! It’s possible that the new version of iOS 17 may have automatically altered some settings on your device, including disabling the Auto Brightness feature. Let’s make sure that it’s enabled.
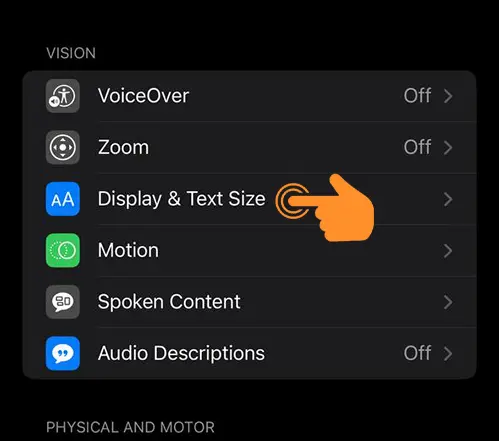
- Open the iPhone Settings app. Navigate to the Accessibility section.
- Click on “Display & Text Size.”
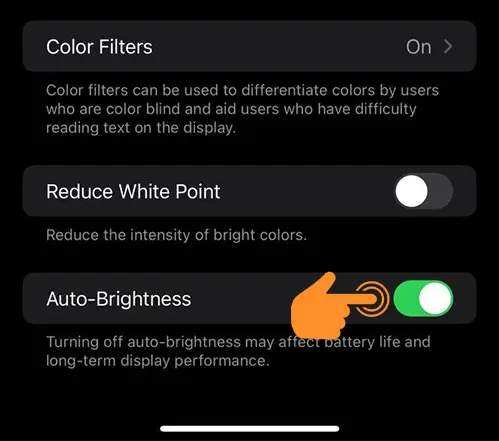
- Scroll down until you find the “Auto-Brightness” option.
- If the switch next to Auto-Brightness is off, toggle it on. If it’s already on, try toggling it off and then back on again to refresh the setting.
3. Clean Ambient Light Sensor
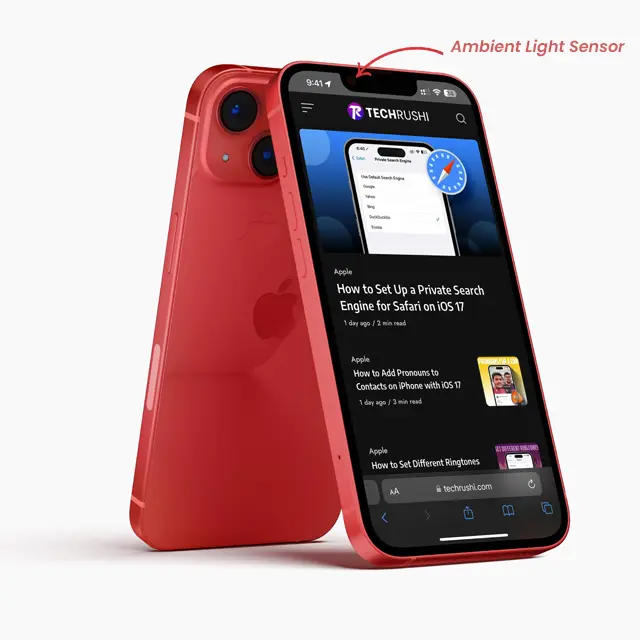
If the previous tips didn’t do the trick, the culprit might be the Ambient Light Sensor. This sensor plays a critical role in adjusting your iPhone’s brightness based on the lighting in your surrounding environment. But what if something is blocking this sensor, like dust or a scratched screen protector?
- Locate the Ambient Light Sensor on your iPhone. It’s typically situated near the camera, within the notch at the top of the display.
- If you find any dust or debris, gently use a clean, soft cloth to wipe the area. Be sure to avoid using any harsh chemicals or abrasive materials that might damage the sensor.
4. Manually Check Brightness Level
Still your auto brightness not working? Sometimes, a manual check of the brightness level can shed light on whether it’s a software bug or a hardware issue.
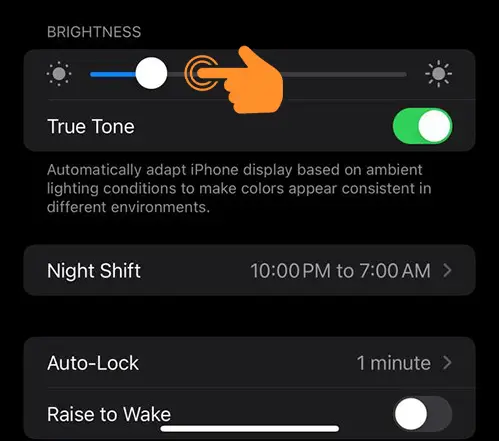
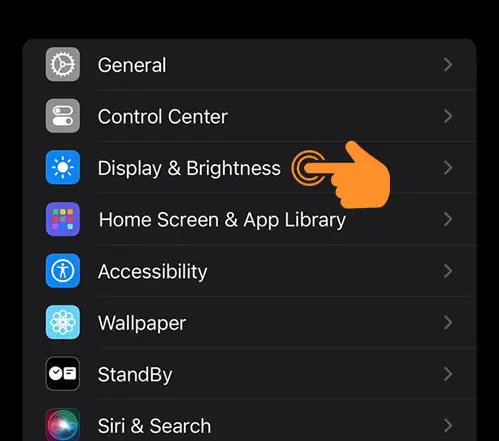
- Open your iPhone settings app, and tap on “Display & Brightness.”
- Locate the slider next to the Brightness section.
- Adjust the slider to various positions, checking whether the screen brightness changes in accordance with your adjustments.
If your iPhone’s screen brightness changes as you move the slider, it indicates that there’s likely not a hardware issue, but rather some software bugs affecting the auto brightness feature.
5. Command Siri to Adjust Brightness
Have you ever thought of using Siri, to manage the brightness of your iPhone? This innovative and convenient method can be a quick way to determine if the brightness controls are working properly on your device. Here’s how to do it:
- Activate Siri by saying “Hey Siri” or holding down the Home button (or the Side button on newer iPhones)
- Provide a command for adjusting the brightness. For example, you can say “Siri, increase brightness to 60%,” and your iPhone’s brightness should automatically adjust to 60%.
- You can experiment with different brightness levels by giving commands like “Siri, decrease brightness to 30%” or “Siri, set brightness to maximum.”
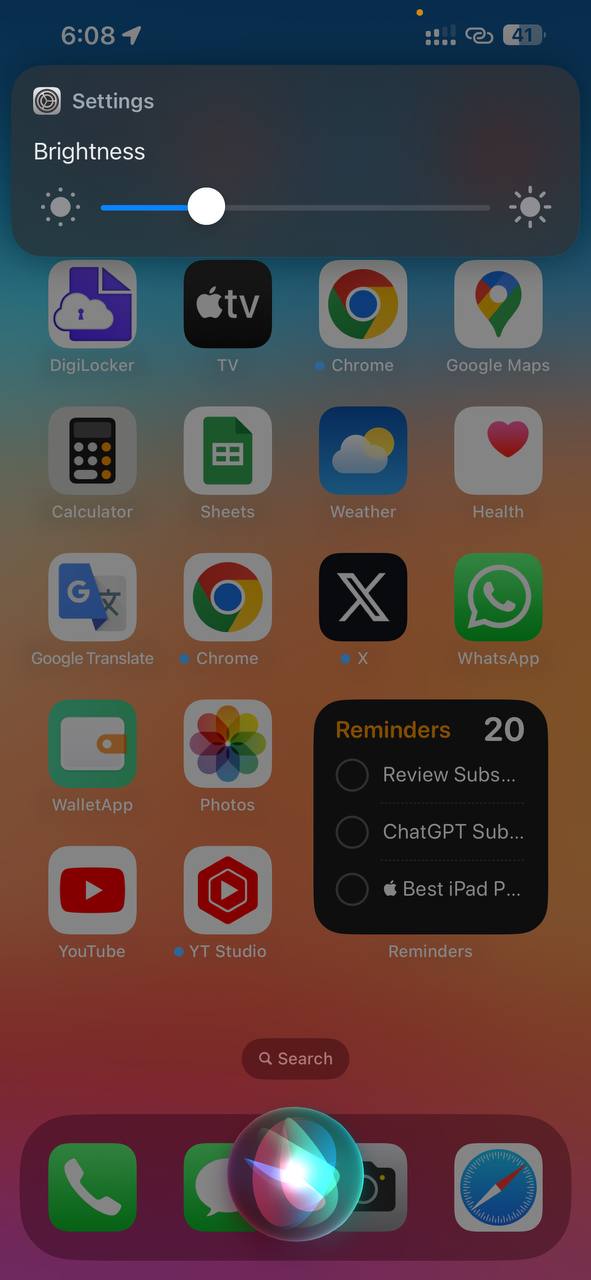
By using Siri to control the brightness, you can quickly and hands-free adjust the brightness to suit your needs.
Also, Check: How to Give Multiple Commands to Siri on iPhone
Note: You can use “Siri” instead of “Hey, Siri” on the latest iOS 17. This means that you can simply say “Siri, make my screen brighter” or “Siri, make my screen dimmer” without having to say “Hey, Siri” first.
Command | Description |
---|---|
“Siri, make my screen brighter.” | Increases the brightness to 1 level. |
“Siri, make my screen dimmer.” | Decrease the brightness by 1 level. |
“Siri, set my screen brightness to 50%.” | Set the brightness to 50%. |
“Siri, turn my screen brightness to max.” | Increase the brightness to Max level. |
“Siri, turn my screen brightness to minimum.” | Decrease the brightness to the Minimum level. |
6. Uninstall Recently Downloaded Apps
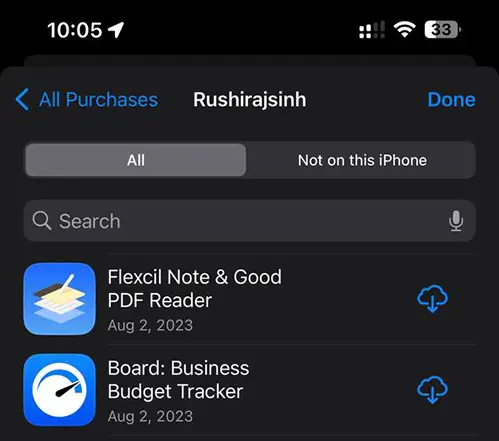
Sometimes, conflicts with recently downloaded third-party apps can lead to unexpected issues on your iPhone. This can happen especially with beta updates of iOS 17, where some apps might not yet be fully compatible. Here’s how you can identify and uninstall the conflicting apps:
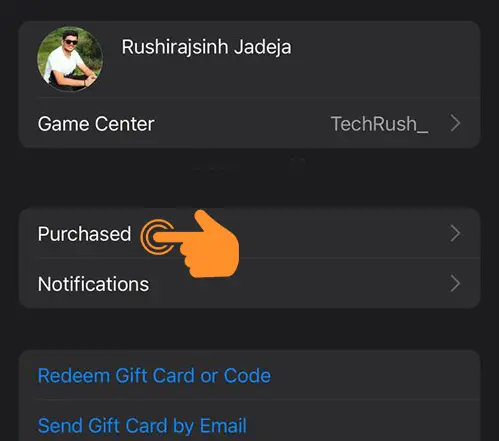
- Open the App Store on your iPhone and Tap on your profile icon.
- Click on “Purchased,” then select “My Purchases.”
- Here, you can review all the latest downloaded apps on your iPhone.
7. Turn off Low Power Mode
Low Power Mode is a handy feature on iPhones designed to save battery drain issues by reducing or turning off certain functions, including auto brightness. If you’re experiencing issues with auto brightness on your iPhone after upgrading to iOS 17, disabling Low Power Mode might solve the problem. Here’s how to do it:
- Open the Settings app on your iPhone. Tap on “Battery.”
- Locate the “Low Power Mode” option, and toggle off the switch next to it.
8. Disable Night Shift Mode
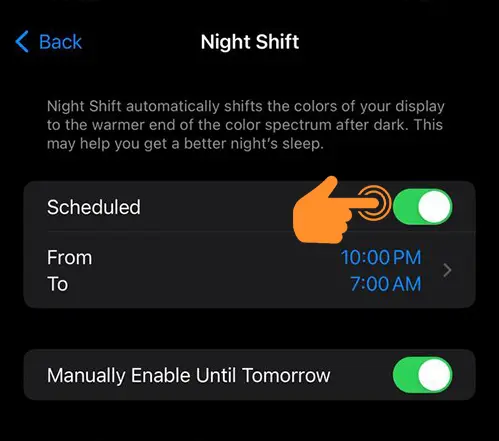
Night Shift mode is a feature on iPhones that alters the colors of your display to the warmer end of the spectrum during the evening. While it’s designed to reduce blue light emissions in low-light conditions, it might sometimes conflict with the auto brightness settings.
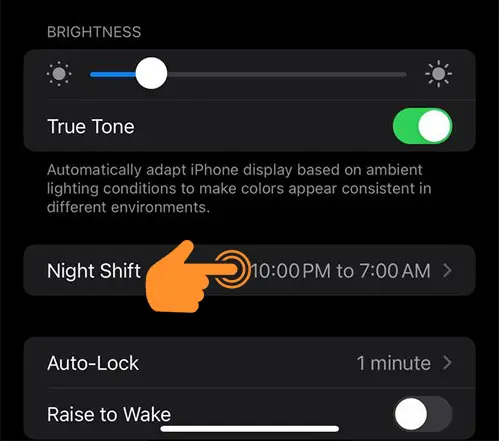
- Go to the iPhone Settings app and Tap on “Display & Brightness.”
- Tap on “Night Shift.”
- Set the schedule to “Off,” or toggle off the switch if it’s manually enabled.
9. Check True Tone Settings
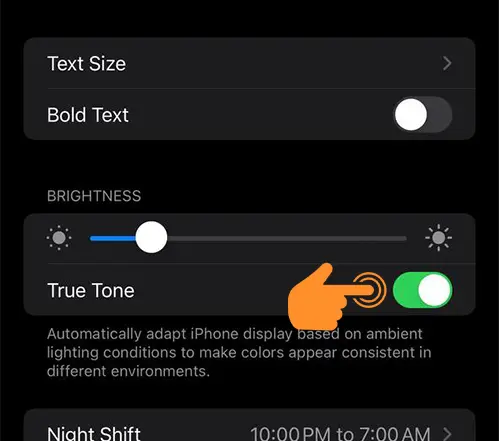
True Tone is enhancing your iPhone display’s color accuracy by adjusting the white balance to match the ambient light. However, if the True Tone calibration is incorrect, it could influence auto brightness calculations. Navigate to Settings > Display & Brightness > Disable True Tone.
10. Disable Low Light Mode
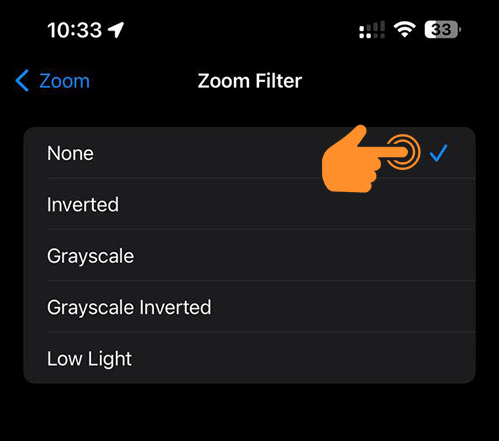
Low Light Mode is a handy feature for those who want to reduce the brightness of their iPhone to an even lower level than what is usually available through the standard brightness settings. This can be particularly useful during nighttime usage or in dark environments. Follow these to disable Low Light Mode:
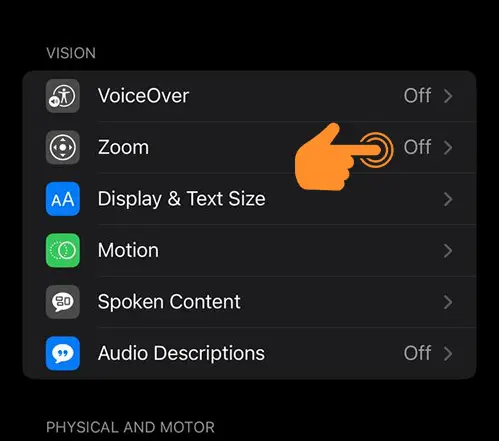
- Open the Settings app on your iPhone and Tap on “Accessibility.”
- Navigate to the “Zoom” section.
- Locate the option for “Low Light” under the Zoom filter and change it to none.
11. Disable Zoom Effects
Most iPhone users do not use this feature, but the Zoom feature on the iPhone provides the ability to magnify different parts of the screen. To disable go to Settings > Accessibility > Zoom > Tap on the toggle to turn it off.
12. Disable Reduce White Point
The “Reduce White Point” feature in iOS is designed to minimize the intensity of bright colors, making the display easier on the eyes. While this can be a helpful feature, try to disable it and check your problem. Go to Settings > Accessibility > Display & Text Size > Look for the “Reduce White Point” option, and tap on the switch to turn it off.
13. Reset all iPhone settings
If the auto brightness issue continues to persist after trying the previous solutions, it may be necessary to reset all of your iPhone’s settings. This action will revert all custom settings to their default configuration and can rectify complex conflicts.
- Open the Settings app on your iPhone. Tap on “General.”
- Scroll down and select “Transfer or Reset iPhone.”
- Choose Reset > Reset All Settings.
Please note that resetting all settings will not erase any personal data or apps but will revert any customized settings, such as Wi-Fi passwords, network settings, and privacy preferences.
14. Factory Reset your iPhone
If all other troubleshooting steps have failed to resolve the auto brightness issue on your iPhone, you might need to consider performing a factory reset. Please note that this should be considered a last resort, as it will result in the loss of all your personal data.
- Open the Settings app on your iPhone. Click on “General.”
- Scroll down and select Transfer or Reset iPhone.
- Choose “Erase All Content and Settings.”
- You will be prompted to enter your Apple ID password and confirm the action.
Once the reset is complete, you’ll need to set up your iPhone as a new device. If the factory reset resolves the auto brightness issue, you can restore your backed-up data during the setup process.
Note: Before proceeding with a factory reset, make sure to back up all important data. You can create a backup using iCloud or iTunes to keep your photos, apps, contacts, and other essential information.
15. Wait for the Next iOS 17 Update
If you’re enrolled in the iOS 17 Developer or Public beta program, it can have unforeseen bugs and issues. In some instances, the problem may be linked to the current beta version of the iOS itself, and it might already be acknowledged by Apple’s development team. So you need to wait for the next iOS 17 update.
16. Switch iOS 17 Beta to Stable
If you are on a beta version of iOS 17 and encountering issues with auto-brightness, switching to the stable release might resolve the problem. You can downgrade your device to iOS 16 easily via iTunes and by downloading IPSW File.
Note: If you downgrade from iOS 17 beta to iOS 16 stable version, your iCloud backup will not work on the downgrade version. This means that you will lose all of your data if you do not back up your device before downgrading.
17. Check Third-Party Apps
If you’ve exhausted all the methods above and the auto brightness feature still doesn’t work, you might consider using third-party applications designed to control screen brightness. This is only a temporary solution.
18. Experiment with Different Locations
Auto brightness works by adapting to the ambient light in your surroundings. Sometimes, the feature might not respond correctly due to specific lighting conditions or technical glitches that misread the environment. Check Indoor and Outdoor Environments.
19. Experiment with Different Orientations
The orientation of your iPhone (portrait or landscape) may impact how the ambient light sensor reads the light in the environment. Trying both orientations could reveal whether the issue with auto brightness is related to how you’re holding or positioning the device.
20. Verify the Authenticity of Your iPhone Screen
If you’ve recently had your iPhone’s screen replaced, particularly if done through an unauthorized repair center, it could be the root cause of auto brightness not functioning properly.
21. Adjust or Change Your iPhone Case
Certain iPhone cases, particularly those that are military-grade or heavily reinforced, may inadvertently cover or obstruct the ambient light sensor that is responsible for auto brightness. Try to remove the case temporarily or choose a compatible case.
22. Replace or Adjust the Screen Protector
A worn-out, scratched, or improperly applied screen protector could potentially interfere with the iPhone’s auto brightness functionality. The screen protector may obstruct the ambient light sensor or scatter the incoming light in a way that confuses the system. To resolve this issue, you might need to replace or adjust the screen protector. Check some best screen protectors for your iPhone on Amazon.
23. Check for Any Hardware Damage
Physical damage to your iPhone can lead to the malfunctioning of various components, including the ambient light sensor responsible for auto brightness. If the device has been dropped, submerged in water, or subjected to harsh conditions, it might affect this crucial feature.
24. Replace the iPhone logic board
The logic board is essentially the “brain” of the iPhone, housing the CPU, memory, and other essential components. If it malfunctions, it can cause a wide array of issues, including problems with auto brightness. Contact someone who expert in these fields or Apple Care to replace the logic board.
25. Contact Apple Support
After trying all the previous solutions, if the auto brightness issue still persists, contacting Apple Support is a great step.
Waiting for Auto Fix
With a success rate of 99.99%, we’re confident that the solutions provided above will help you fix the auto brightness issue on your iPhone after updating to iOS 17. If you’ve effectively resolved the problem, why not share this guide with friends in need? Stay tuned for more iOS troubleshooting guides, and always remember, when in doubt, restart your device – it might just save the day!