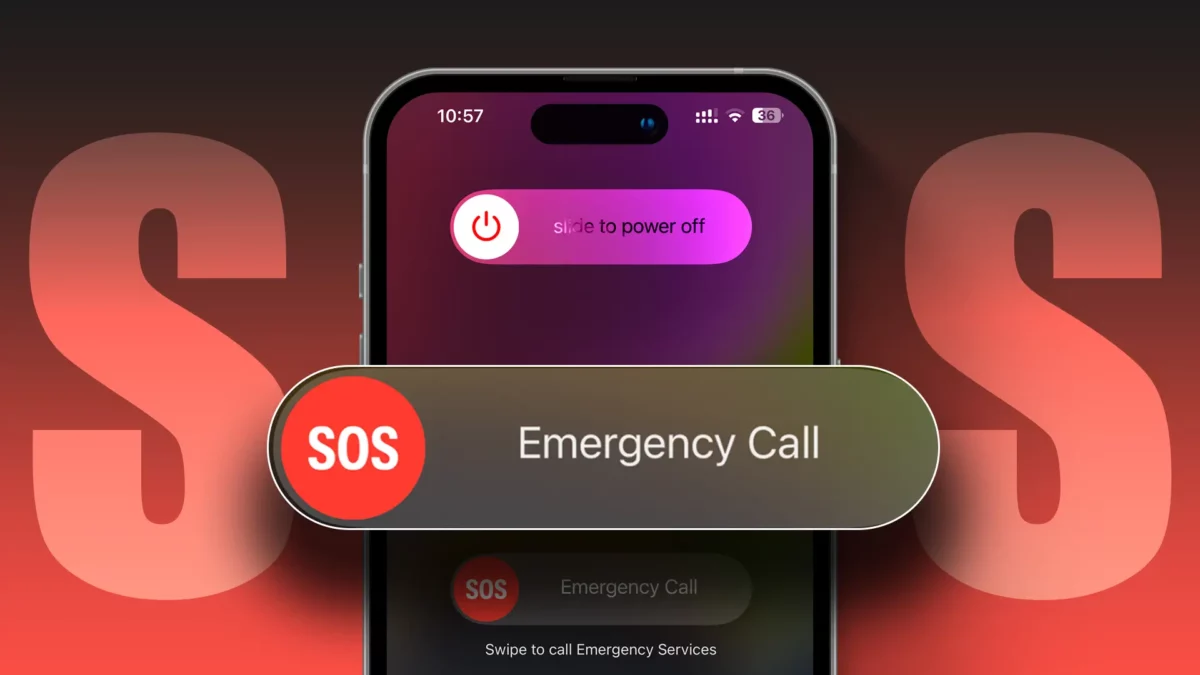
- You can add an emergency contact on your iPhone using the Health app.
- Emergency contacts can be accessed from your iPhone’s lock screen.
If you’ve recently purchased a new iPhone, don’t forget to add an emergency contact. This guide shows you how to add this feature to your iPhone’s medical list for emergency situations.
While we hope you never need this feature, it’s always best to be prepared.
What is an Emergency Contact on an iPhone?
An emergency contact is a trusted individual, typically a close friend or family member, who can be contacted during emergencies. This person would be aware of important details about you and can make decisions on your behalf if you’re unable to. This feature is available on various Apple devices, including the iPhone, iPad, and Apple Watch.
This contact list is added to your Medical ID, making it accessible to strangers from your lock screen. They can find information like your name, blood group, and the people added to your contact list.
You can access this Medical ID from your lock screen passcode screen or by pressing and holding the power and volume up or down buttons until the “Medical ID” slider appears.

Why Have an Emergency Contact?
- Quick Calls: If you’re in danger, unconscious, or unable to speak, a stranger can quickly reach out to your emergency contacts.
- Making Choices: Emergency contacts can make important decisions, such as medical treatments, if you’re unable to.
- Vital Information: They can share crucial details like your allergies or ongoing medications, helping medical staff act efficiently. (If you set it up on your Health app)
- Updates on Your Whereabouts: Using the Emergency SOS on your device will alert and update your contacts about your last location.
If you press and hold the Power and Volume buttons for a few seconds, the “Medical ID” option pops up. Apple Watch users can press and hold the side button (not the crown) to see it.
How to Add an Emergency Contact
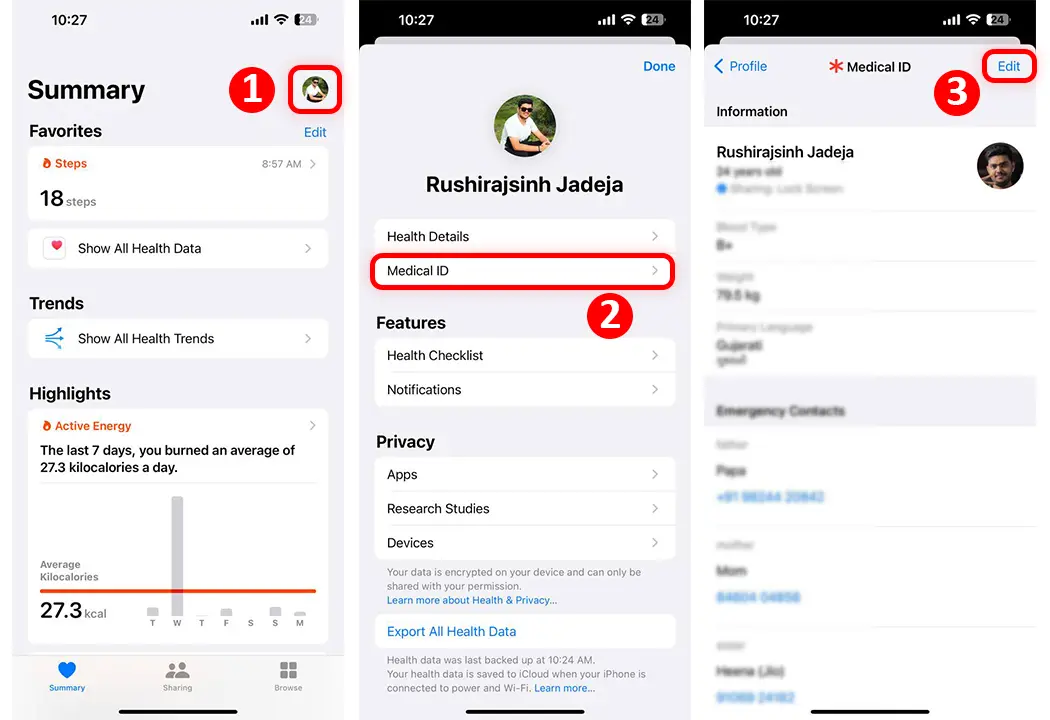
- Open the Health app on your iPhone.
- Tap on your profile picture at the top-right.
- Go to Medical ID.
- Hit Edit in the upper-right corner.
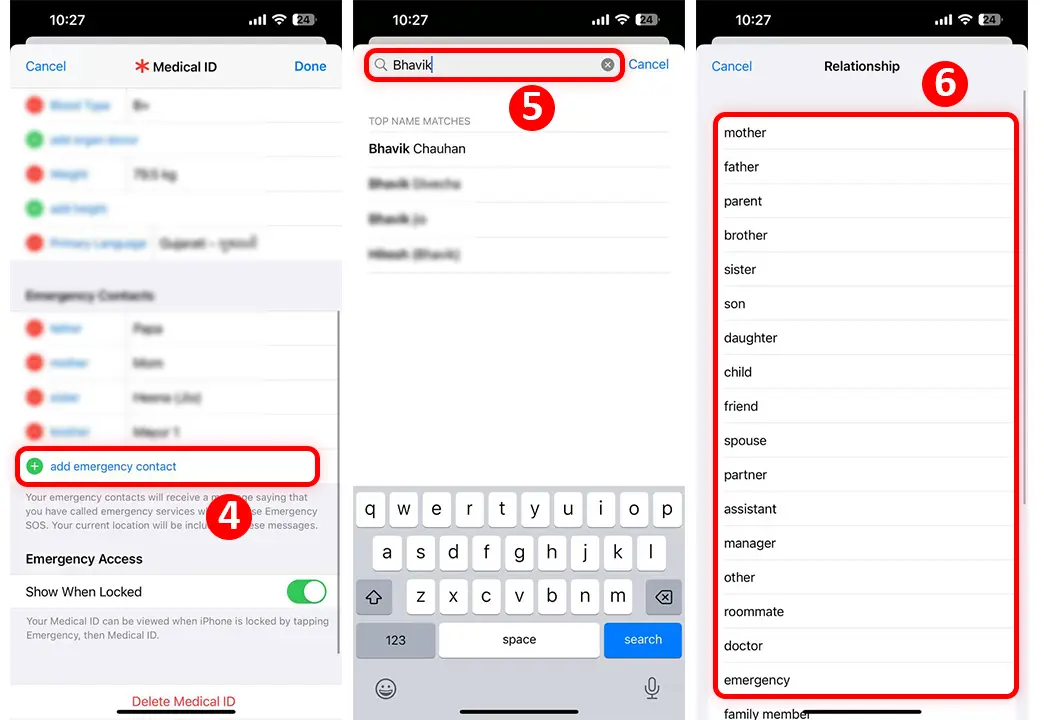
- Choose Add Emergency Contact.
- Pick or search for the contact you’d like to set.
- Define your relationship with this person.
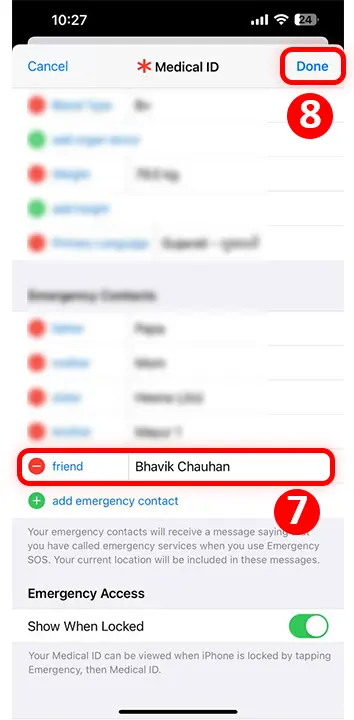
- Once added, this contact will appear in the Emergency Contact list. Click on “Done” to save.
Removing an Emergency Contact
- Open the Health app on your iPhone.
- Tap your profile picture, and go to Medical ID.
- Under the “Emergency Contacts” section, you’ll see your current contacts.
- Click on “Edit” at the top-right.
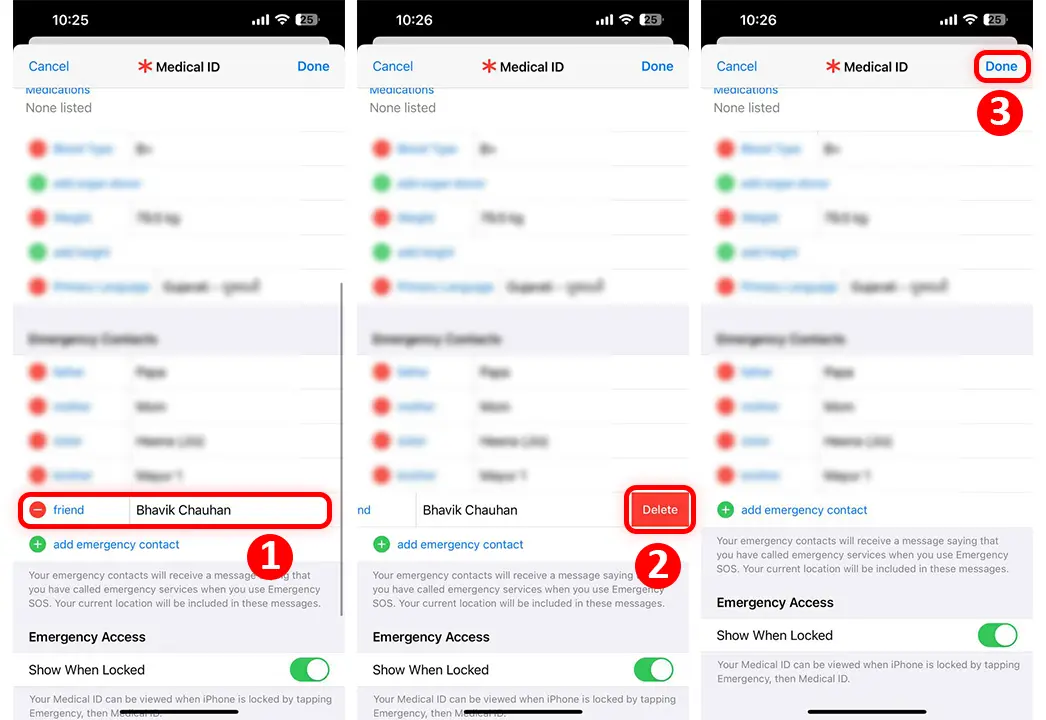
- Find the contact to remove and tap the red minus (-) next to their name. Then, tap “Delete.”
- Save your changes by clicking “Done.”
By setting this up, even if your iPhone is locked, a stranger can see your Medical ID and reach out to your contacts.
I highly recommend that if you are an owner of an iPhone or Apple Watch, please don’t forget to add genuine information about yourself in Medical ID, and add your loved ones as emergency contacts.
Adding emergency contacts on your iPhone could be a lifesaver.
